Maven

依赖管理

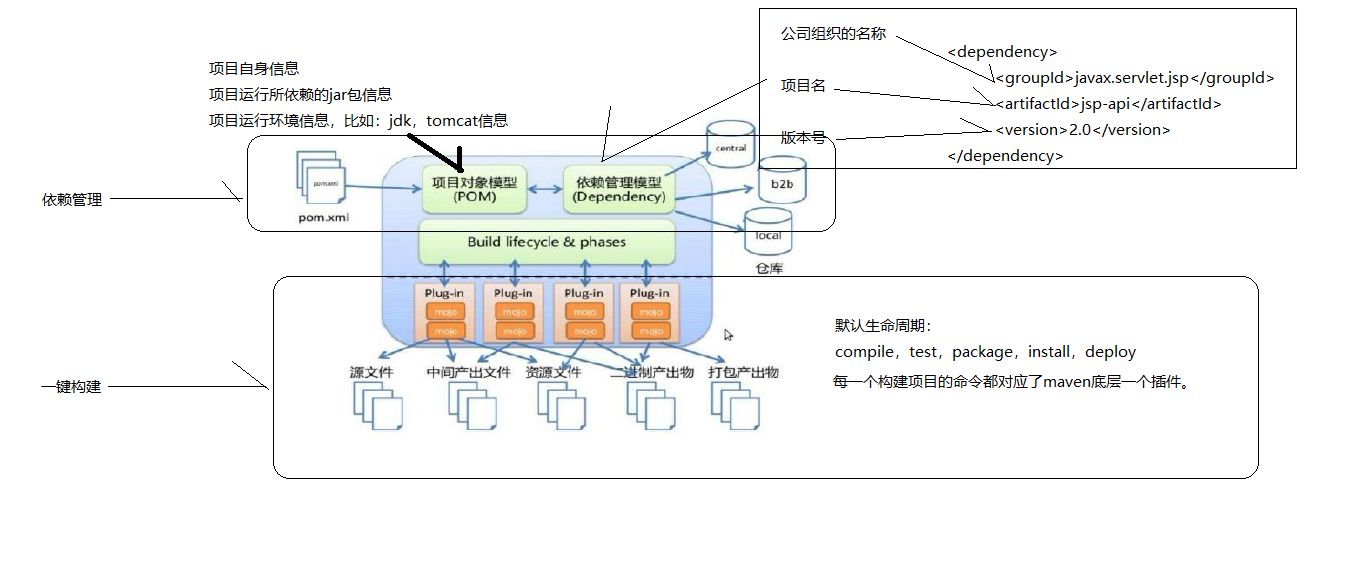
  • Maven工程对jar包的管理
  • 传统项目jar包放在项目中,Maven项目的jar包放在jar包仓库中,只需要在Maven项目中放置jar包的坐标,编译和运行中,Maven工程会通过坐标找到jar包的位置

安装Maven

  1. Maven下载
  2. 配置环境变量
    • 在系统变量中配置MAVEN_HOME:输入放置Maven的目录
    • Path中配置:**%MAVEN_HOME%\bin**

配置settings.xml

  1. 配置本地仓库位置

    • 在maven包下的conf\settings.xml中找到Default: ${user.home}/.m2/repository
    • 在下面加一行:<localRepository>本地仓库jar包位置</localRepository>
  2. 配置阿里云中央仓库

    • <mirrors>标签内配置
    1
    2
    3
    4
    5
    6
    7
    8
    9
    10
    11
    12
    13
    14
    15
    16
    17
    18
    19
    20
    <mirror>
    <id>alimaven</id>
    <mirrorOf>central</mirrorOf>
    <name>aliyun maven</name>
    <url>http://maven.aliyun.com/nexus/content/repositories/central/</url>
    </mirror>

    <mirror>
    <id>repo1</id>
    <mirrorOf>central</mirrorOf>
    <name>Human Readable Name for this Mirror.</name>
    <url>http://repo1.maven.org/maven2/</url>
    </mirror>

    <mirror>
    <id>repo2</id>
    <mirrorOf>central</mirrorOf>
    <name>Human Readable Name for this Mirror.</name>
    <url>http://repo2.maven.org/maven2/</url>
    </mirror>
  3. 配置编译时的jdk版本

    • <profiles>中配置
    1
    2
    3
    4
    5
    6
    7
    8
    9
    10
    11
    12
    <profile>
    <id>jdk1.8</id>
    <activation>
    <activeByDefault>true</activeByDefault>
    <jdk>1.8</jdk>
    </activation>
    <properties>
    <maven.compiler.source>1.8</maven.compiler.source>
    <maven.compiler.target>1.8</maven.compiler.target>
    <maven.compiler.compilerVersion>1.8</maven.compiler.compilerVersion>
    </properties>
    </profile>

目录结构

  • src/main/java:核心代码部分
  • src/main/resources:配置文件部分
  • src/test/java:测试代码部分
  • src/test/resources:测试配置文件部分
  • src/main/webapp:页面资源部分,js,css,图片

常用命令

  1. mvn clean:删除编译过的信息,target目录
  2. mvn compile:编译src/main/java下的代码
  3. mvn test:编译src/main/javasrc/test/java下的代码
  4. mvn package:编译src/main/javasrc/test/java下的代码,并且将项目打包
  5. mvn install:编译src/main/javasrc/test/java下的代码,并且将项目打包,并且将包放到本地仓库

生命周期

  1. 清理生命周期:清理项目编译信息clean
  2. 默认生命周期:编译compile->测试test->打包package->安装install->发布deploy
  3. 站点生命周期

概念模型

maven概念模型图.png

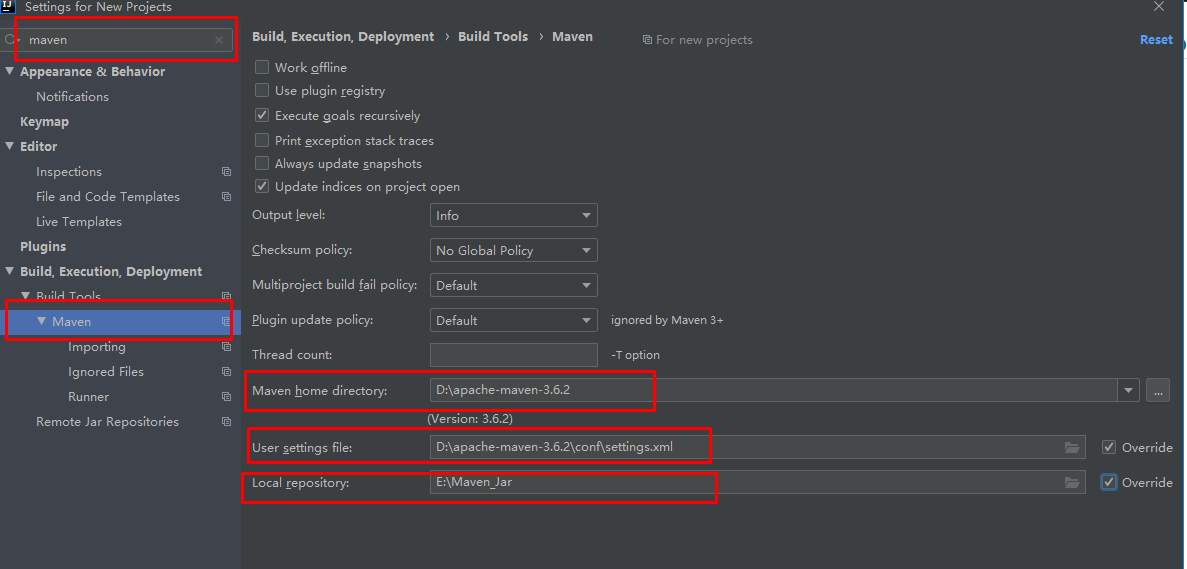
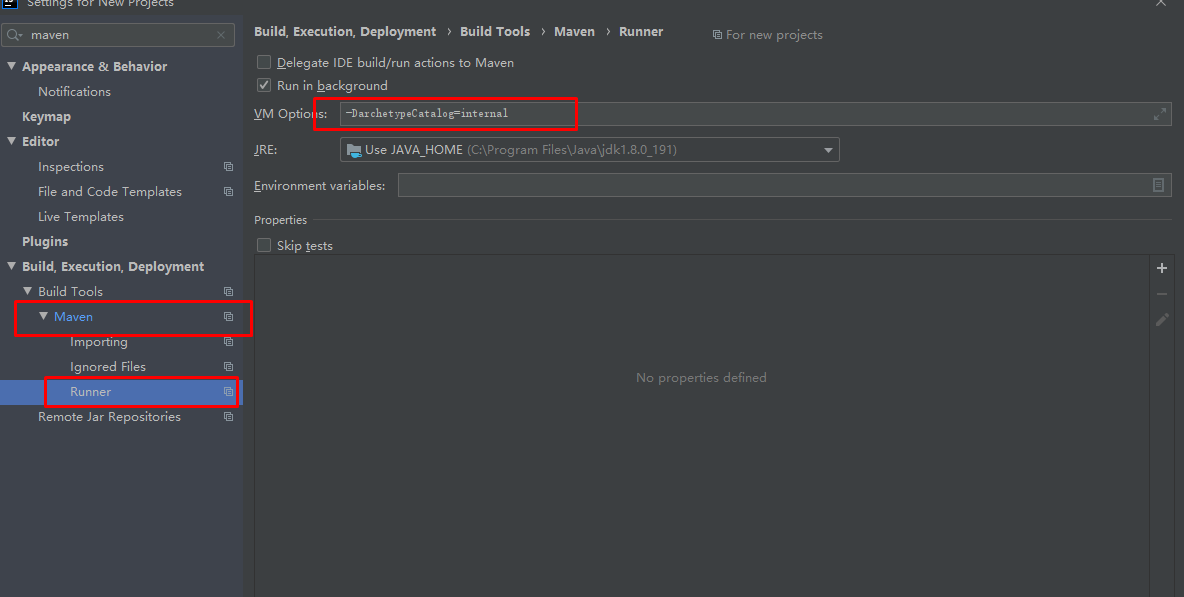
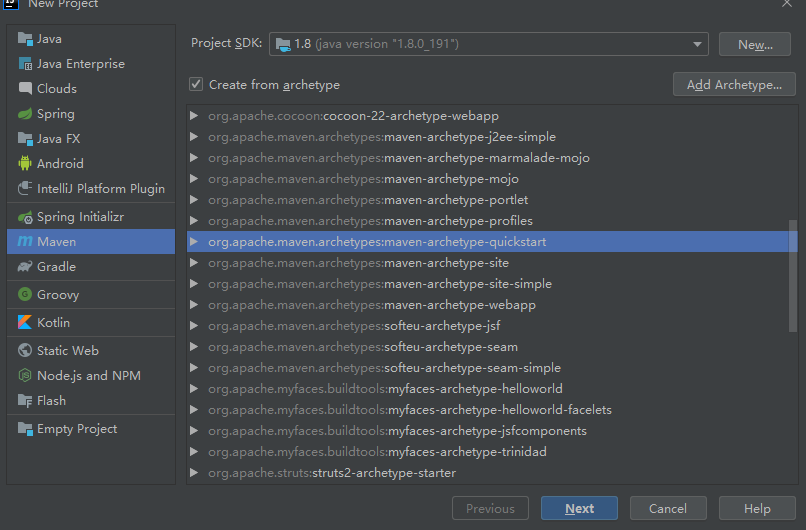
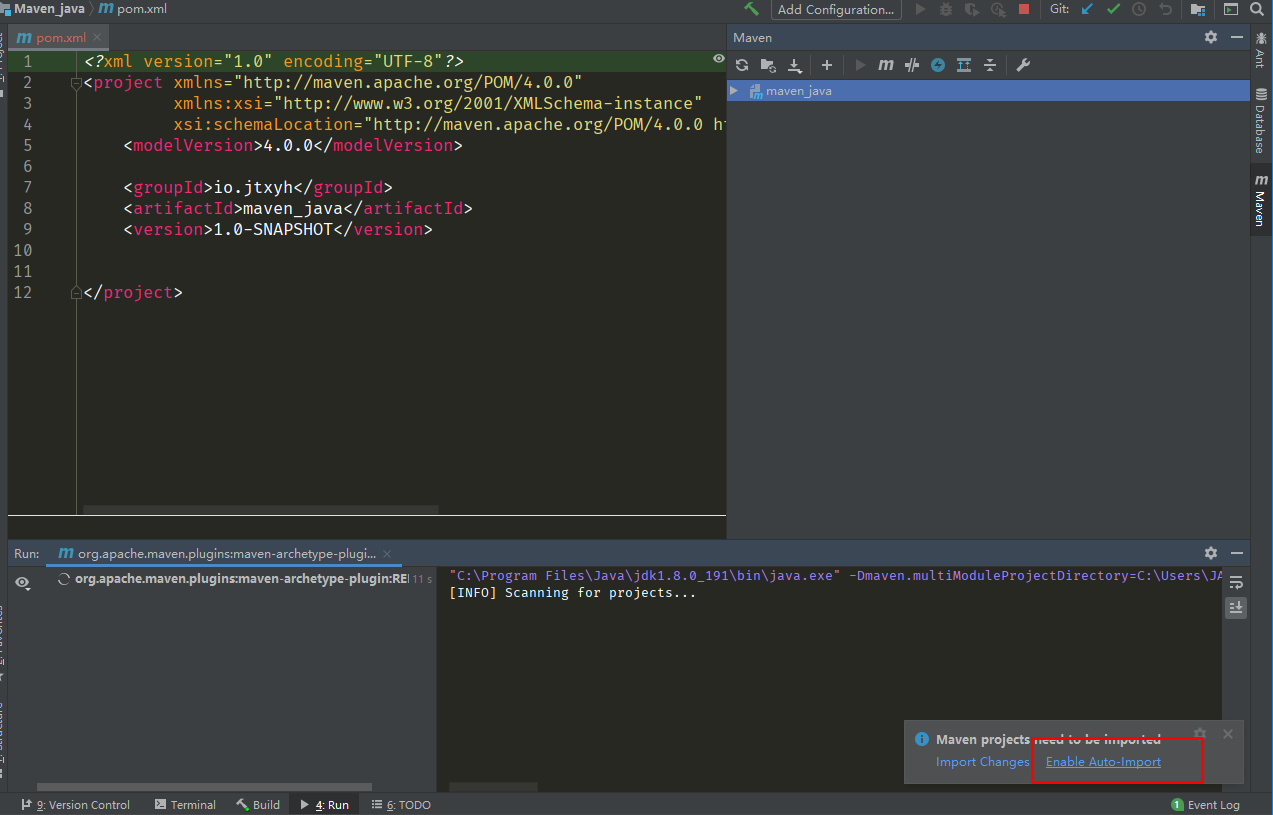
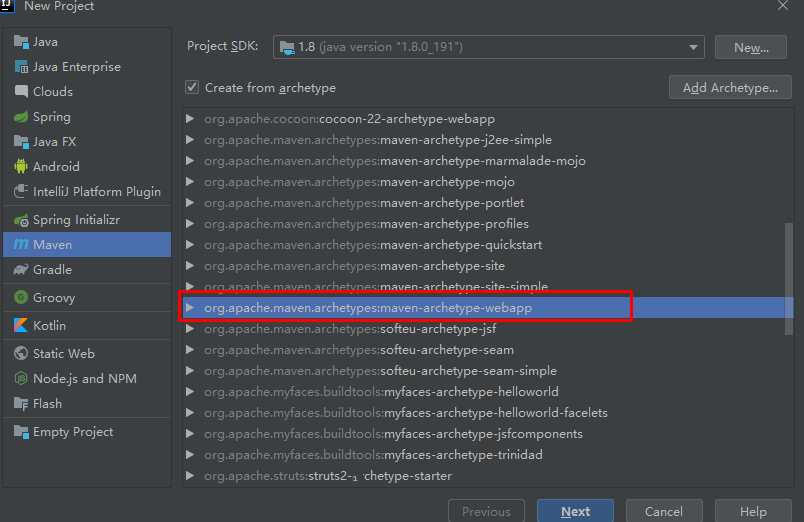
IDEA中Maven操作

1.png
2.png
idea使用骨架创建JAVA工程.png
maven创建.png
选择.png
创建web工程.png

一些插件

1
2
3
4
5
6
7
8
9
10
11
12
13
14
15
16
17
18
19
20
21
22
23
24
25
26
27
28
29
30
31
32
33
34
35
36
37
38
39
40
41
42
43
44
45
46
47
48
49
50
51
52
53
54
<plugins>

内嵌了一个tomcat
<plugin>
<groupId>org.apache.tomcat.maven</groupId>
<artifactId>tomcat7-maven-plugin</artifactId>
<version>2.2</version>
<configuration>
tomcat7部署管理路径
<url>http://localhost:8080/manager/text</url>
tomcat的管理员账号
<username>admin</username>
<password>admin</password>
<port>8080</port>
<path>/02mavenWeb</path>部署路径
<charset>UTF-8</charset>
运行redeploy命令前,要能正常访问http://localhost:8080/manager
</configuration>
</plugin>

jetty应用服务器
<plugin>
<groupId>org.eclipse.jetty</groupId>
<artifactId>jetty-maven-plugin</artifactId>
<version>9.4.24.v20191120</version>
<configuration>
<httpConnector>
<port>8080</port>
</httpConnector>
<webApp>
<contextPath>/</contextPath>
</webApp>
</configuration>
</plugin>

配置逆向工程
<plugin>
<groupId>org.mybatis.generator</groupId>
<artifactId>mybatis-generator-maven-plugin</artifactId>
<version>1.3.2</version>
<dependencies>
<dependency>
<groupId>mysql</groupId>
<artifactId>mysql-connector-java</artifactId>
<version>5.1.34</version>
</dependency>
</dependencies>
<configuration>
<overwrite>true</overwrite>
<configurationFile>src/main/resources/generator.xml</configurationFile>
</configuration>
</plugin>

</plugins>

相关文章

数据库连接池

SpringIOC

Junit和Spring

Tomcat

Servlet

Request,Response和ServletContext

Cookie和Session

JSP和EL和Jstl

Filter和Listener

Mybatis